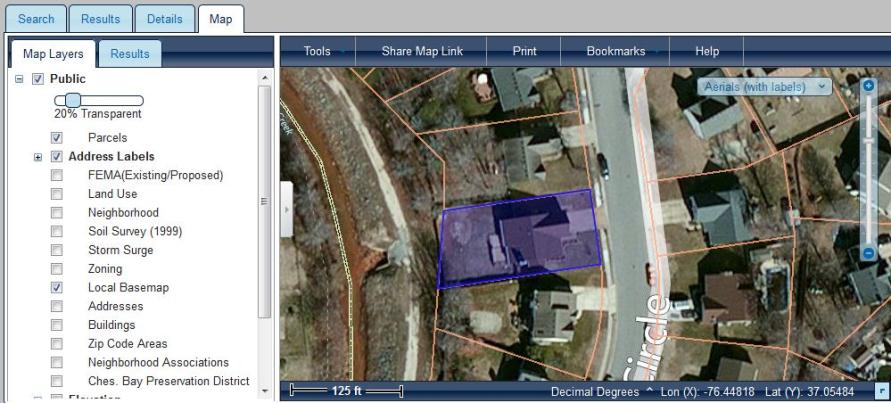
From the "Details" tab, the selected property can be viewed on the map by clicking on the "Map" tab or the "View in Map" link. When the map is displayed, it will automatically zoom to the selected property and highlight it as shown below.
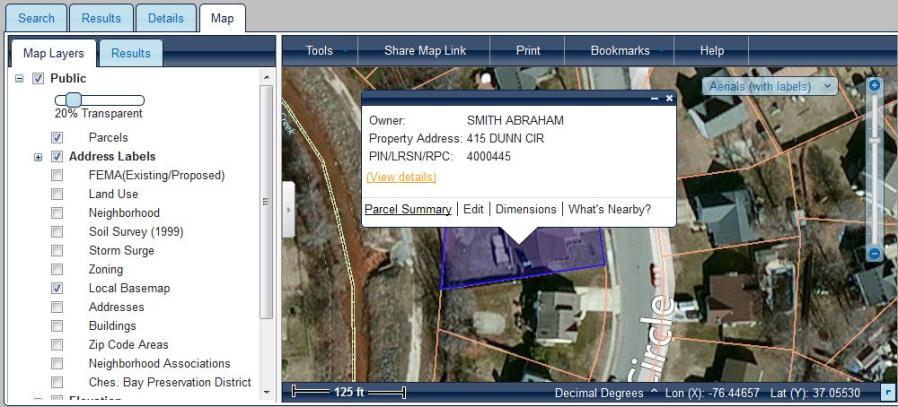
To view summary information about the property, or any parcel on the map, simply click the map to display a bubble window. The "View details" link in this window can be used to go back to the "Details" tab and show the information for the selected property.
To switch between the Map Layers and Results, click on the tab with the name of the function you want to access. You can resize the console area with the divider between the Console and the Map. You can also click on the arrow button on the far right of the console, which will collapse the entire console. This allows more room to view either area as you work.
Depending on your web browser, you can remove the browser header information by using the F11 key on your keyboard. This will provide you with more room to see the map on your screen.
You can use the mouse to perform nearly all navigation functions on the map:

|
Left Mouse:Click on the left mouse button and drag the map to the new location |

|
Mouse Wheel:Scroll the mouse wheel forward to zoom in and backward to zoom out. Each wheel click will zoom the map by about 50 percent in width and height. |

|
Shift + Left Mouse:Hold the Shift key down, then hold the left mouse button down and drag on the map to draw a rectangle. The map will zoom in to the area of the rectangle. |

|
Double-Click:Double-click on the mouse to zoom in or out by about 50 percent in width and height. |
|
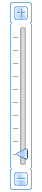
Zoom Bar:Drag pointer up or click or symbols |

|
Right Mouse:Click on the right mouse button and select "Print/Export Current Map View" or Insert Pushpin. |
|
|
Left Mouse:Single-click on the visible map feature you want to identify. |

|
Right Arrow:Click on the right keyboard arrow to go back one map extent. |

|
Left Arrow:Click on the left keyboard arrow to go forward one map extent. |

|
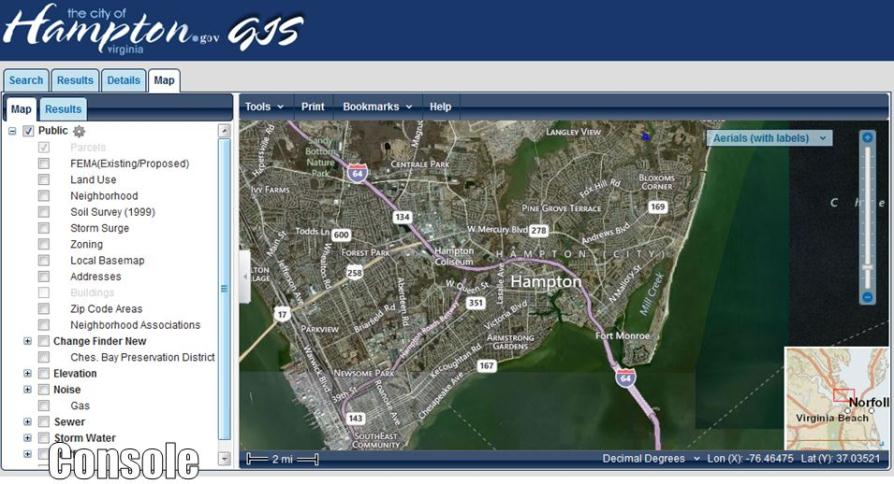
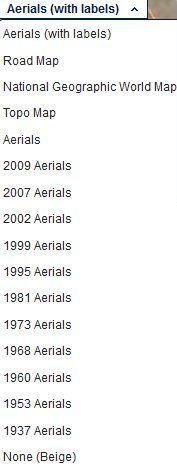
The web mapping interface allows you to easily access commonly used background data. By default, the "Aerials (with labels)" background data layer is displayed. |
Click on the Aerials (with labels) box near the top right of the map to see a list of all available Background data layers which includes multiple years of aerial photography and two colors of "None" or blank background. When you choose a background dataset, it will always be available and the map layers you turn off or on in the map layer list will be displayed on top of the background. You can also toggle between two background datasets using the swipe tool (which is described in the "Map Tools" section), which can be useful to detect changes between two aerial photo flights.
The web mapping application has a number of map layers available with it. These map layers have names, legends and may be grouped together. To expand a grouped layer, click on the plus sign to the left of any layer that is displayed in bold. You can turn the map layer on and off by clicking on the checkbox beside the map layer. Due to the size or content of the data, some data layers may not be available at all scales. If a map layer is grayed out (such as the layers in the Noise group in the graphic below) then the layer is not available for display at the current zoom level. To make these layers become available, zoom in on the map until they are no longer grayed out.
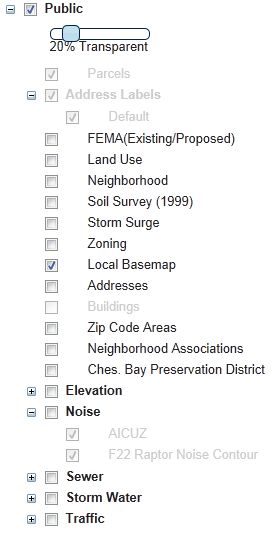
The transparency of the map layers can also be adjusted by clicking on the "gear" icon at the top of the layer list which will display a transparency slider. By default, all of the map layers are set to a transparency of 20%.
![]()